Creating an API Token
NOTE: An API token has all of the permissions/policies as the user that created the API token.
To create an API token:
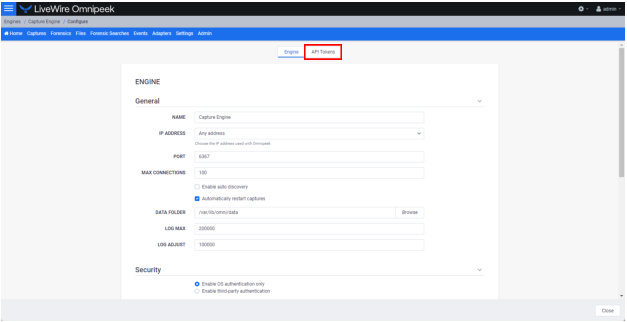
1. Use Omnipeek to view the Home page.

2. Click . The Engine page appears.
3. Click . The API Tokens page appears.
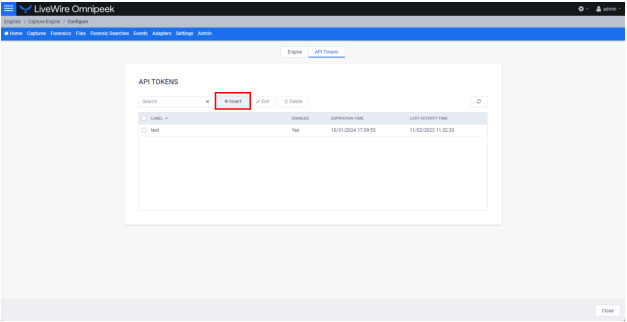
4. Click . The Insert API Token dialog appears.
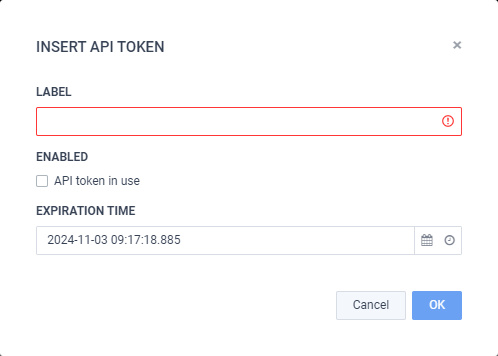
5. Configure the dialog:
◦ Label: Enter a descriptive label for the API token. A descriptive label helps you to identify the API token.
◦ Enabled: Select the check box to enable the API token.
◦ Expiration Time: Click the Select date and Select time icons to set the date and time in which the API token expires and can no longer be used.
6. Click . A blue banner appears and displays the API token along with its Label. You can now use the new token from the blue banner for REST-API authentication.
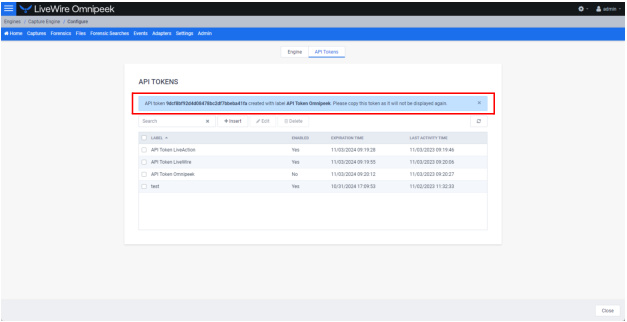
IMPORTANT: Please copy the token from the blue banner and save it to a safe location. For security reasons, the token will not be displayed again.