Monitoring Traffic
The following provide a ‘Best Practices’ for monitoring traffic in a VMware environment with LiveWire Virtual.
Monitoring VM Traffic (Standard Switch)
The following instructions will allow you to monitor all VM traffic going across a standard virtual switch. To do so, requires the creation of a new port group on the standard switch to be monitored. By creating the monitoring port group, we will be able to capture all traffic traversing the switch while not affecting the existing infrastructure.
NOTE: To perform these actions you will need permissions to create port groups on existing vSwitches.
1. Log into the ESXi/ESX host or vCenter Server using the vSphere Client.
2. In the vSphere Client, navigate to the host.
3. On the Configure tab, expand Networking and select Virtual Switches.
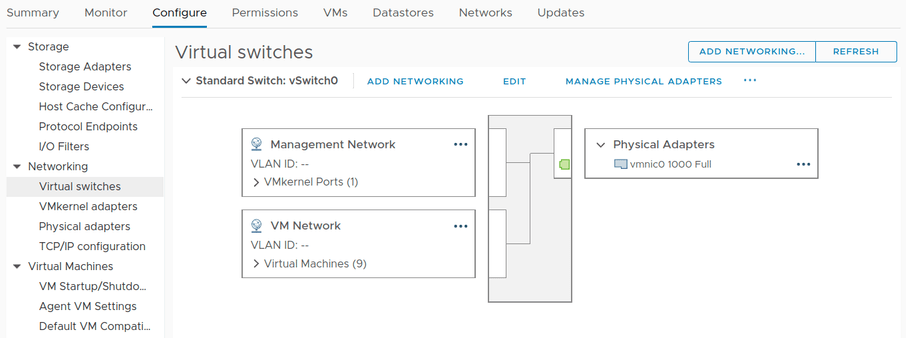
4. Click .
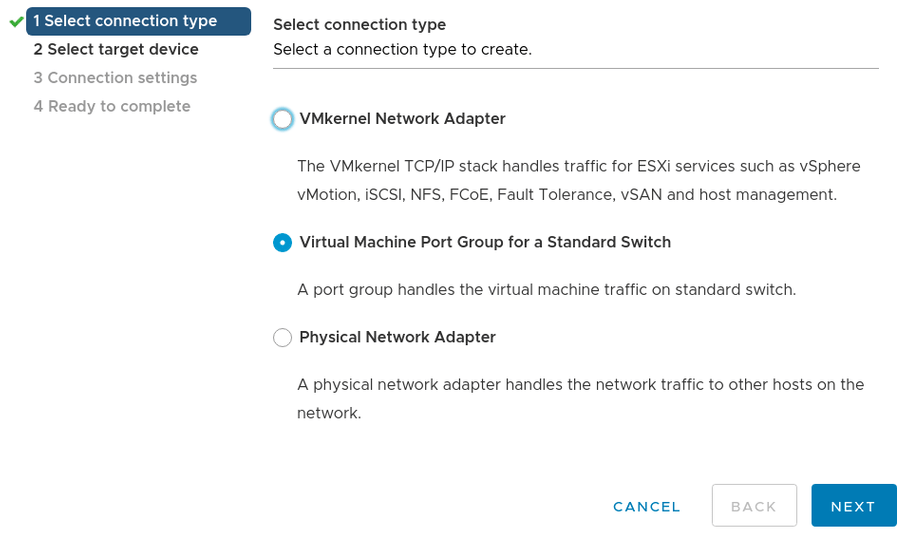
5. In Select connection type, select Virtual Machine Port Group for a Standard Switch and click .
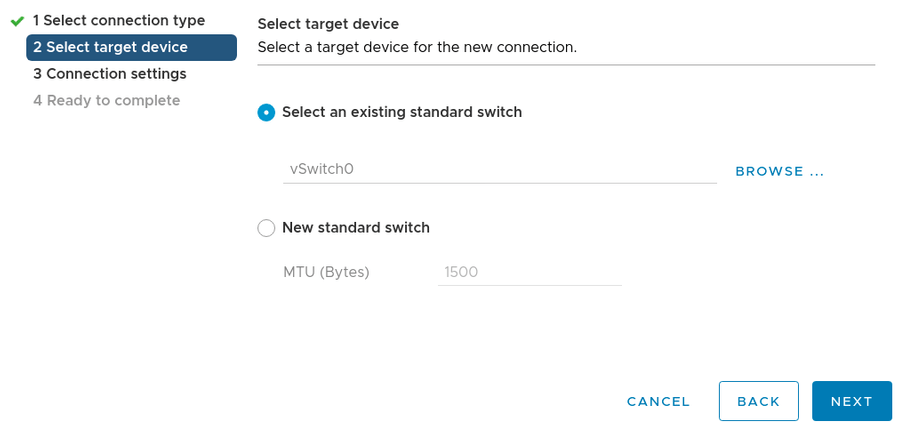
6. In Select target device, click and select an existing standard switch you wish to monitor.
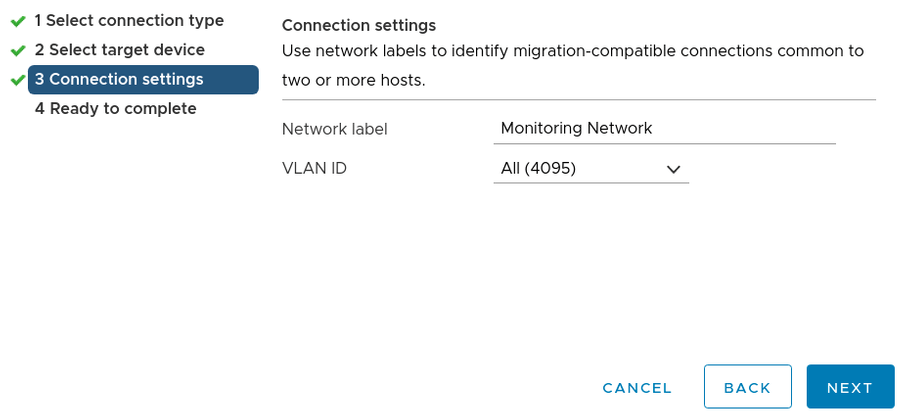
7. On the Connection settings dialog, enter a unique Network label for the new port group. Select the VLAN ID drop-down and choose All (4095), and then click .
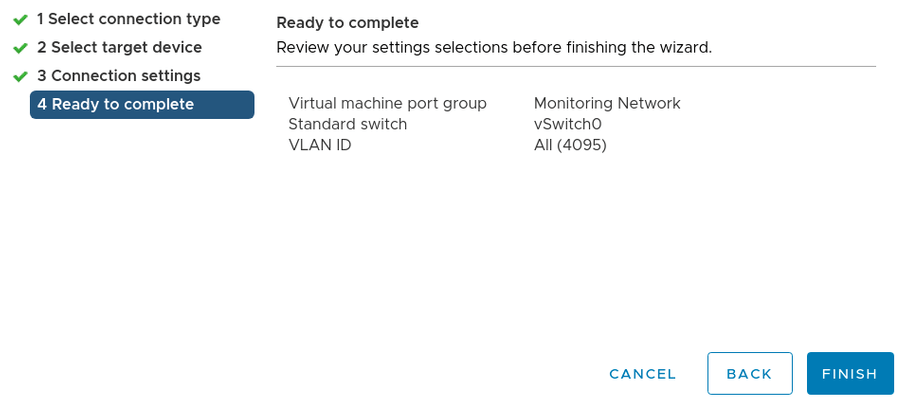
8. Review the port group settings in the Ready to complete page, and click .
9. Once complete the new port group should appear in the topology diagram of the switch.
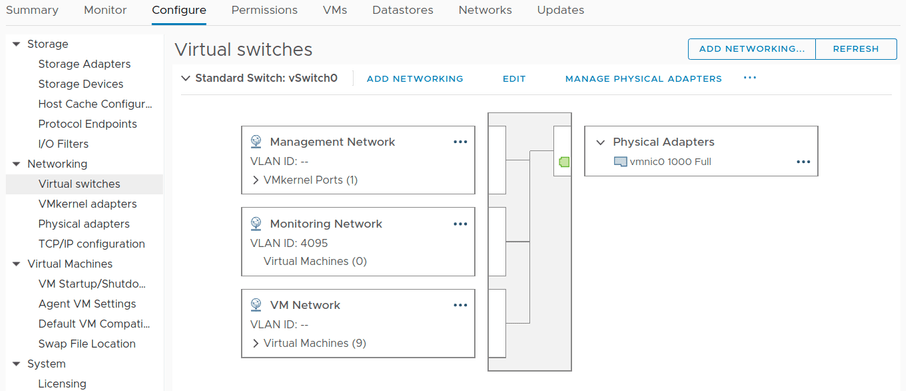
10. In the topology diagram of the switch, click the name of the port group.
11. Next to the Monitoring Network, click the horizontal … (elipsis) icon and select .
12. Select the Security page.
13. Override the switch settings for and select .
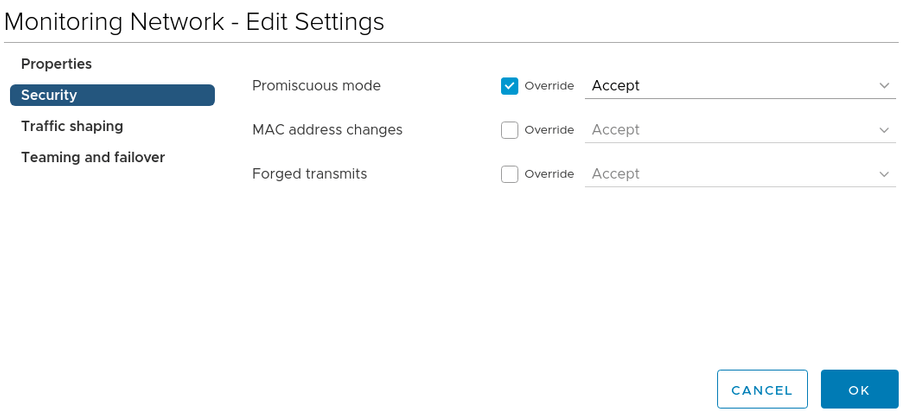
14. Click .
15. Click in the VMware Host Client inventory.
16. Right-click a LiveWire Virtual machine in the list and select Edit settings from the pop-up menu.
17. Click the Virtual Hardware tab and select from the hardware list.
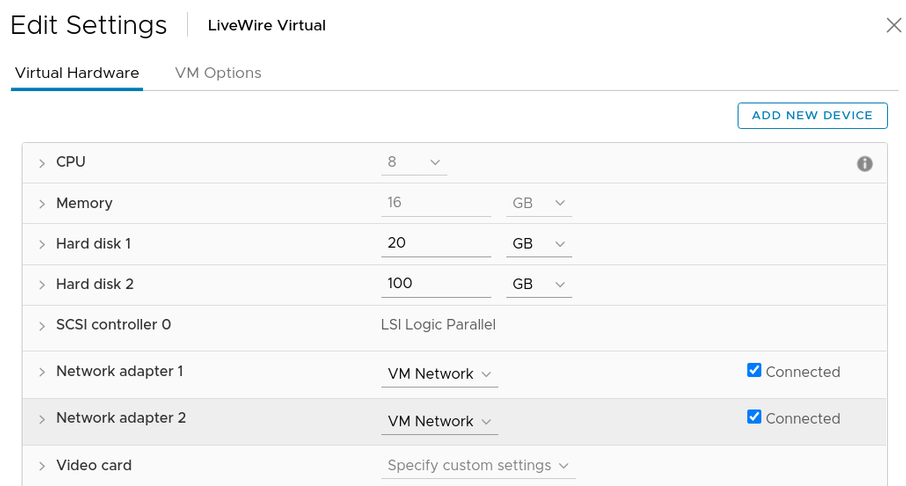
18. In the network connection panel, and select and then click .
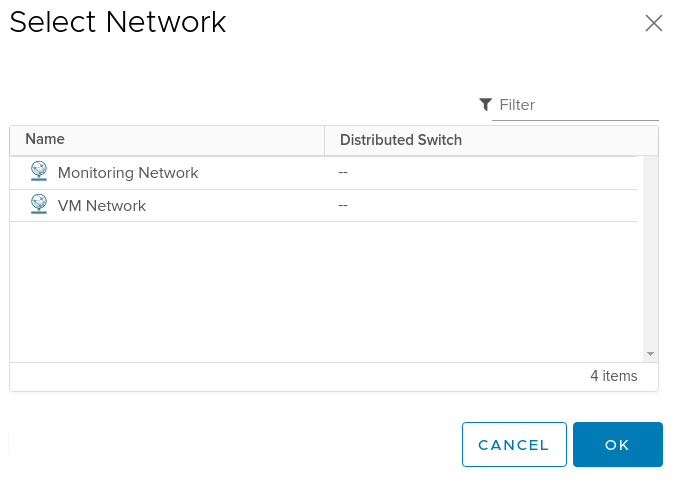
19. Verify the Monitoring Network appears as the selected network for Network adapter 2 and click .
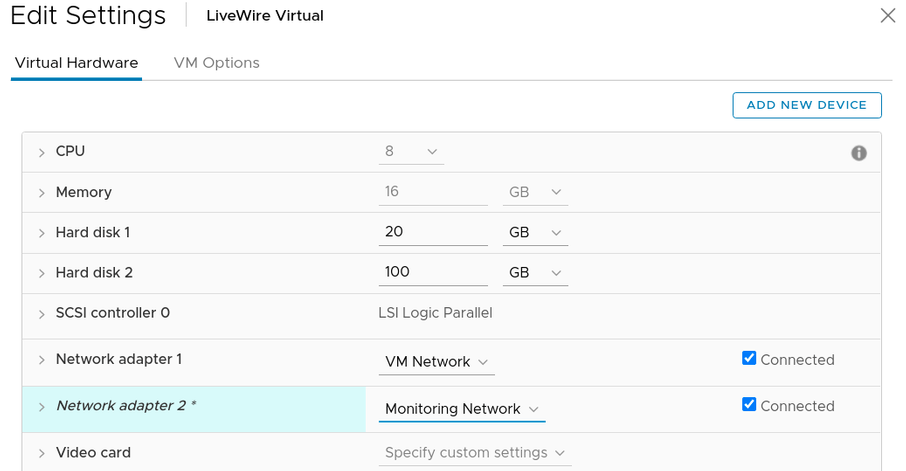
20. Restart the LiveWire Virtual.
Monitoring External Traffic
The following instructions will allow you to monitor spanned traffic into your LiveWire Virtual. This requires the creation of a new standard switch and port group.
NOTE: To perform these actions you will need permissions to create a standard switch and port group for monitoring.
1. Log into the ESXi/ESX host or vCenter Server using the vSphere Client.
2. In the vSphere Client, navigate to the host.
3. On the Configure tab, expand and select .

4. Click .
5. In Select connection type, select Virtual Machine Port Group for a Standard Switch and click .

6. Select New standard switch and click .
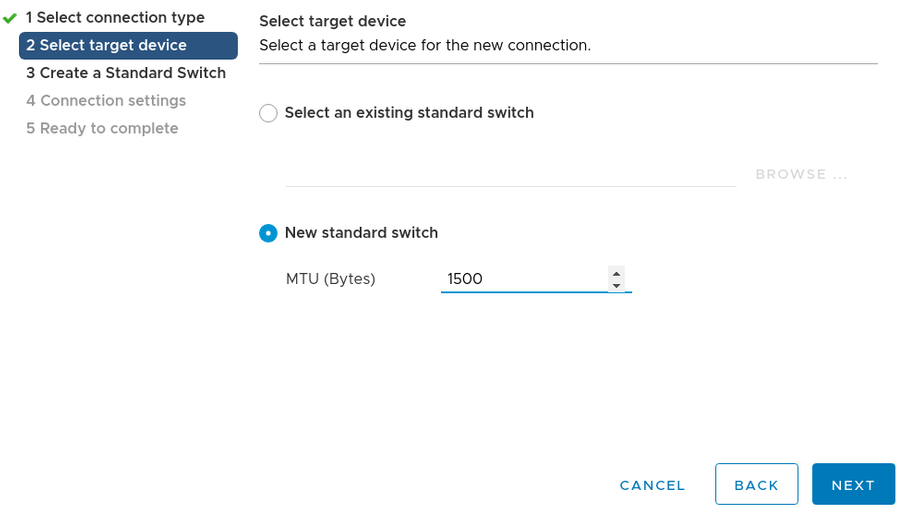
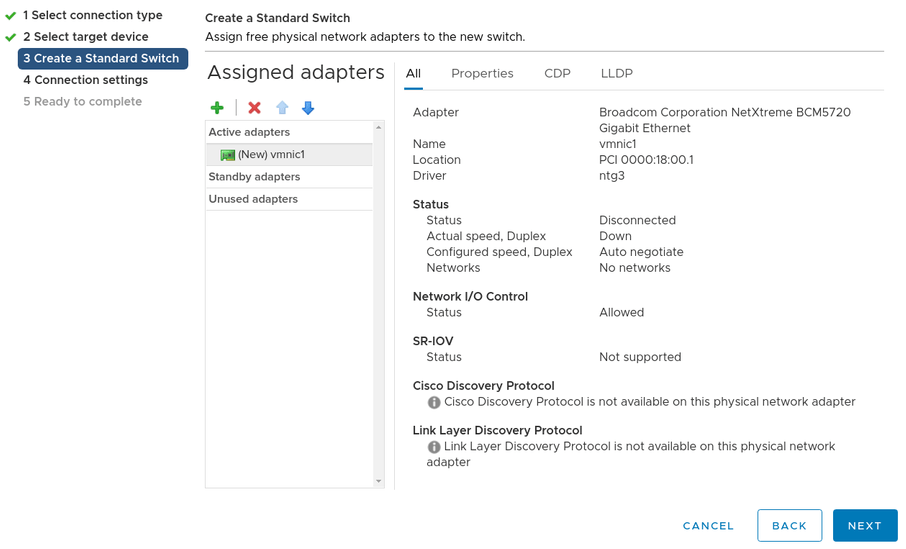
7. Add physical network adapters to the new standard switch. Under Assigned adapters, click adapters.
8. Select one or more physical network adapters from the list and click . Click .
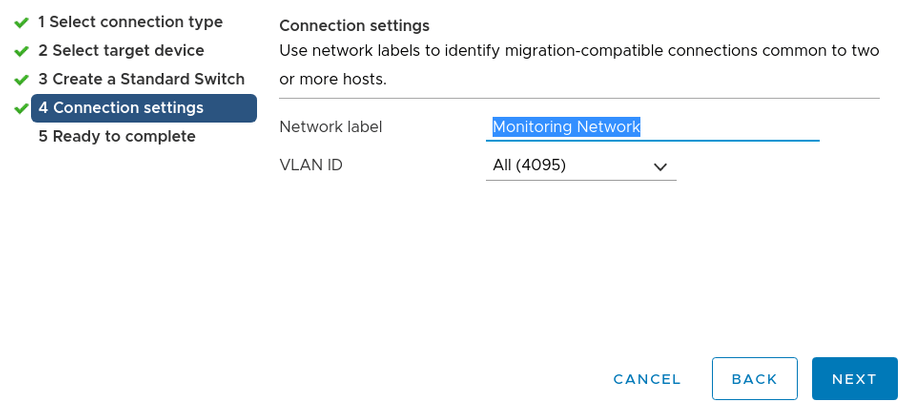
9. On the Connection settings dialog, enter a unique Network label for the new port group. Select the VLAN ID drop-down choose All (4095), and then click .
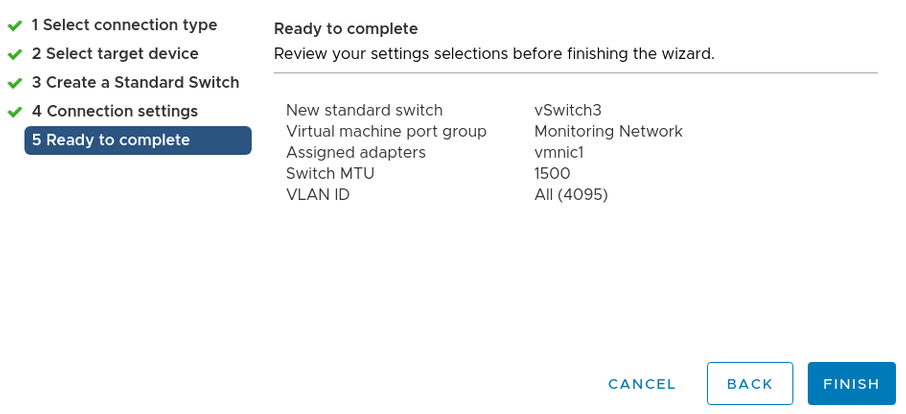
10. Review the port group settings in the Ready to complete page, and click .
11. Once complete the new port group should appear in the topology diagram of the switch.
12. In the topology diagram of the new switch, click the name of the port group.
13. Next to the Monitoring Network, click the horizontal … (elipsis) icon and select Edit settings.
14. Select the Security page.
15. Override the switch settings for Promiscuous mode and select Accept.

16. Click .
17. Click in the VMware Host Client inventory.
18. Right-click a LiveWire Virtual machine in the list and select Edit settings from the pop-up menu.
19. Click the Virtual Hardware tab and select Network adapter 2 from the hardware list.

20. In the network connection panel, Browse… and select Monitoring Network and then click .

21. Verify the Monitoring Network appears as the selected network for Network adapter 2 and click .

22. Restart LiveWire Virtual.